
Plastering is an essential part of construction and home improvement, providing a smooth finish for walls and ceilings that enhances both aesthetics and durability. Mastering plastering techniques can make a significant difference in the quality of your work. Here are ten expert techniques that industry professionals use to achieve outstanding results.
1. Surface Preparation
The foundation of a successful plastering job lies in proper surface preparation. Begin by cleaning the surface thoroughly to remove dust, dirt, grease, and any loose material. For previously painted or wallpapered walls, strip away old coverings and consider using a bonding agent to enhance adhesion. For new drywall, a light sanding helps create a better surface for plaster application.
Tips:
- Use a stud finder to locate framing and ensure you’re not applying plaster over unsupported areas.
- If the surface is uneven, use a leveling compound before plastering.
2. Choose the Right Plaster Mix
Different types of plaster mixes are suited for different applications. Gypsum plaster is commonly used for interior walls, while cement-based plaster is suitable for outdoor or high-moisture areas. Always follow the manufacturer’s instructions for mixing to achieve the right consistency—generally, a creamy, smooth mixture is ideal.
Tips:
- Use a mechanical mixer for larger jobs to ensure uniformity.
- Avoid over-mixing, which can introduce air bubbles.
3. Apply a Scratch Coat
For better adhesion, especially on uneven surfaces or existing walls, apply a scratch coat first. This layer of plaster is roughened with a trowel, creating grooves that allow the finishing layer to bond more effectively.
Tips:
- Ensure the scratch coat is thoroughly dry before applying the finish coat.
- A typical thickness for a scratch coat is about 1/4 inch.
4. Work in Sections
Plastering can dry quickly, especially in warm environments. To maintain control over your work and ensure a smooth finish, apply plaster in small sections, typically no larger than 4×4 feet at a time. This technique allows you to focus on one area, ensuring even application and preventing premature drying.
Tips:
- Keep a wet edge by working quickly and efficiently to avoid lap marks.
- Use a timer to manage your sections effectively.
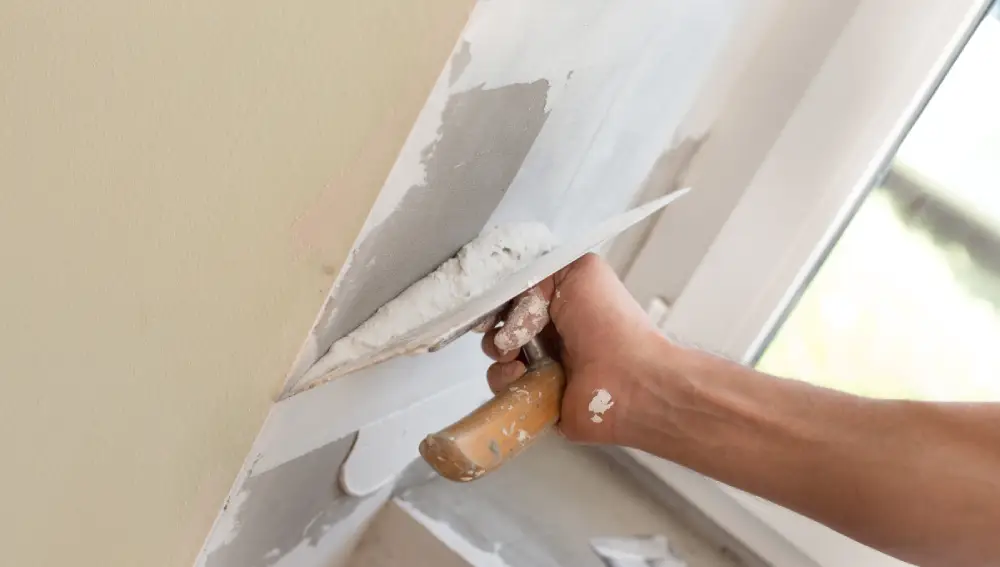
5. Use Proper Troweling Techniques
Troweling is crucial for achieving a smooth finish. Hold the trowel at a 30-degree angle and apply even pressure to spread the plaster. Use long, sweeping motions to ensure uniformity. When finishing, a damp trowel can help smooth out any imperfections.
Tips:
- Avoid excessive pressure, which can lead to uneven surfaces.
- Regularly clean your trowel to prevent plaster buildup.
6. Control Drying Conditions
Environmental conditions significantly impact plaster drying times. Ideal temperatures for plastering range between 50°F and 85°F (10°C and 29°C). High humidity can slow down drying, while low humidity may cause the plaster to dry too quickly, leading to cracks.
Tips:
- Use fans or dehumidifiers to control moisture levels if necessary.
- Protect the area from direct sunlight or wind during application.
7. Apply the Finish Coat Correctly
Once the scratch coat is dry, apply the finish coat with a smooth, even motion. The finish coat should be applied in a thinner layer than the scratch coat, generally around 1/8 inch. Use a clean trowel for this step to avoid mixing old plaster with the new.
Tips:
- Feather the edges of the finish coat to blend it seamlessly with surrounding surfaces.
- Allow for drying time between coats to avoid cracking.
8. Sanding and Smoothing
After the finish coat has dried, lightly sand the surface using fine-grit sandpaper. This step is essential for achieving a perfectly smooth finish. Be cautious not to sand too aggressively, as this can create low spots or damage the plaster.
Tips:
- Use a sanding block for better control and an even finish.
- Vacuum the area to remove dust before applying any paint or additional finishes.
9. Add Texture as Desired
If you want a textured finish, consider applying techniques such as sponge, brush, or combing to the wet plaster before it sets. This can add character to your walls and ceilings. Be creative, and experiment with different tools to achieve the desired effect.
Tips:
- Test your chosen texture technique on a small, inconspicuous area first.
- Work quickly, as plaster can set fast, especially in warmer conditions.
10. Final Clean-Up and Maintenance
After your plastering job is complete, clean your tools thoroughly to extend their lifespan. Rinse trowels, hawks, and buckets immediately after use, as dried plaster can be difficult to remove. Store tools in a dry place to prevent rust.
Tips:
- Consider investing in high-quality tools that are easy to clean and maintain.
- Regular maintenance of your tools will ensure better results in future projects.
Conclusion
Plastering is both an art and a science, requiring practice and attention to detail. By following these ten expert techniques, you can significantly enhance your plastering skills and achieve professional-quality results. Whether you’re tackling a DIY project or working in the construction industry, including commercial plastering in Wellington, mastering these techniques will help you create beautiful, durable finishes that stand the test of time. Happy plastering!